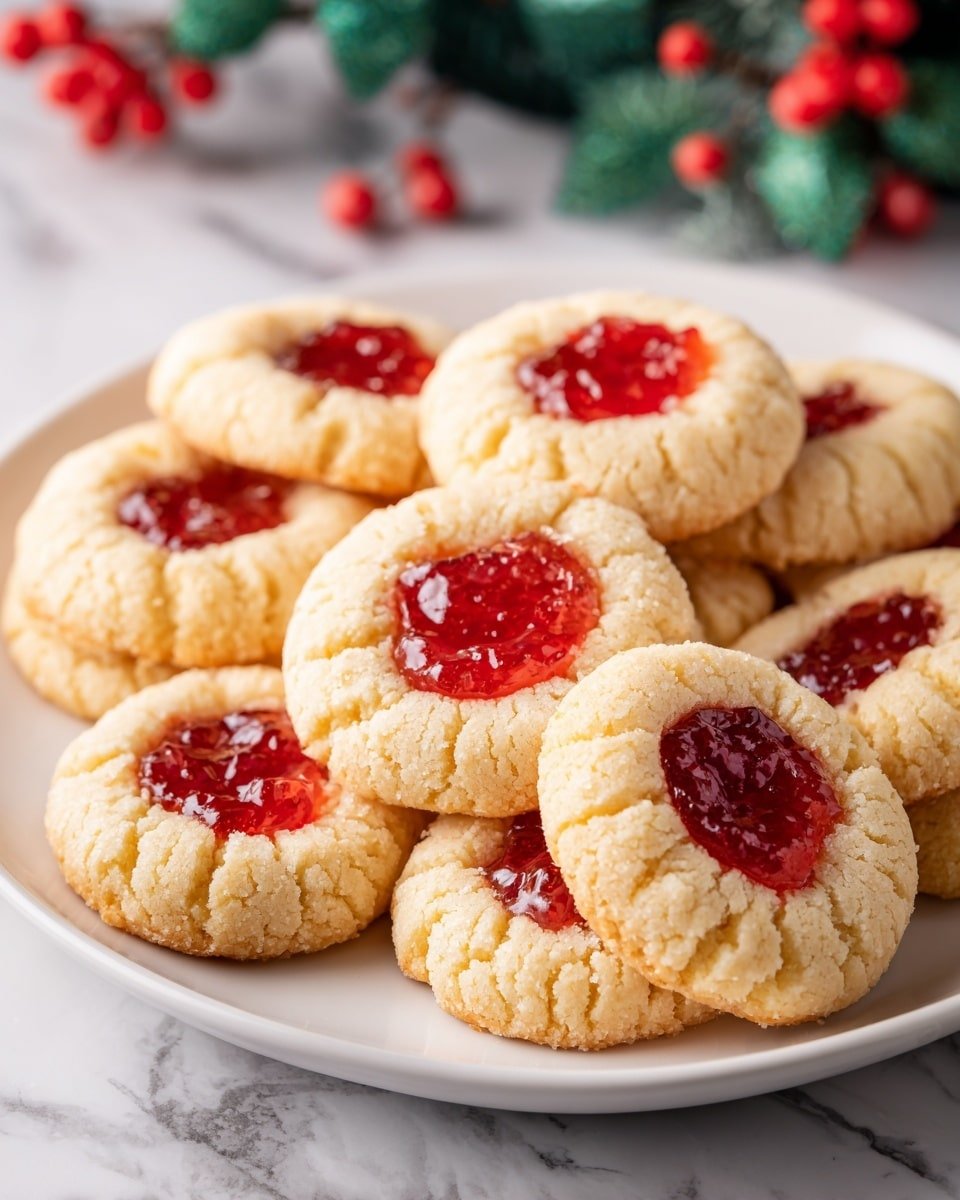
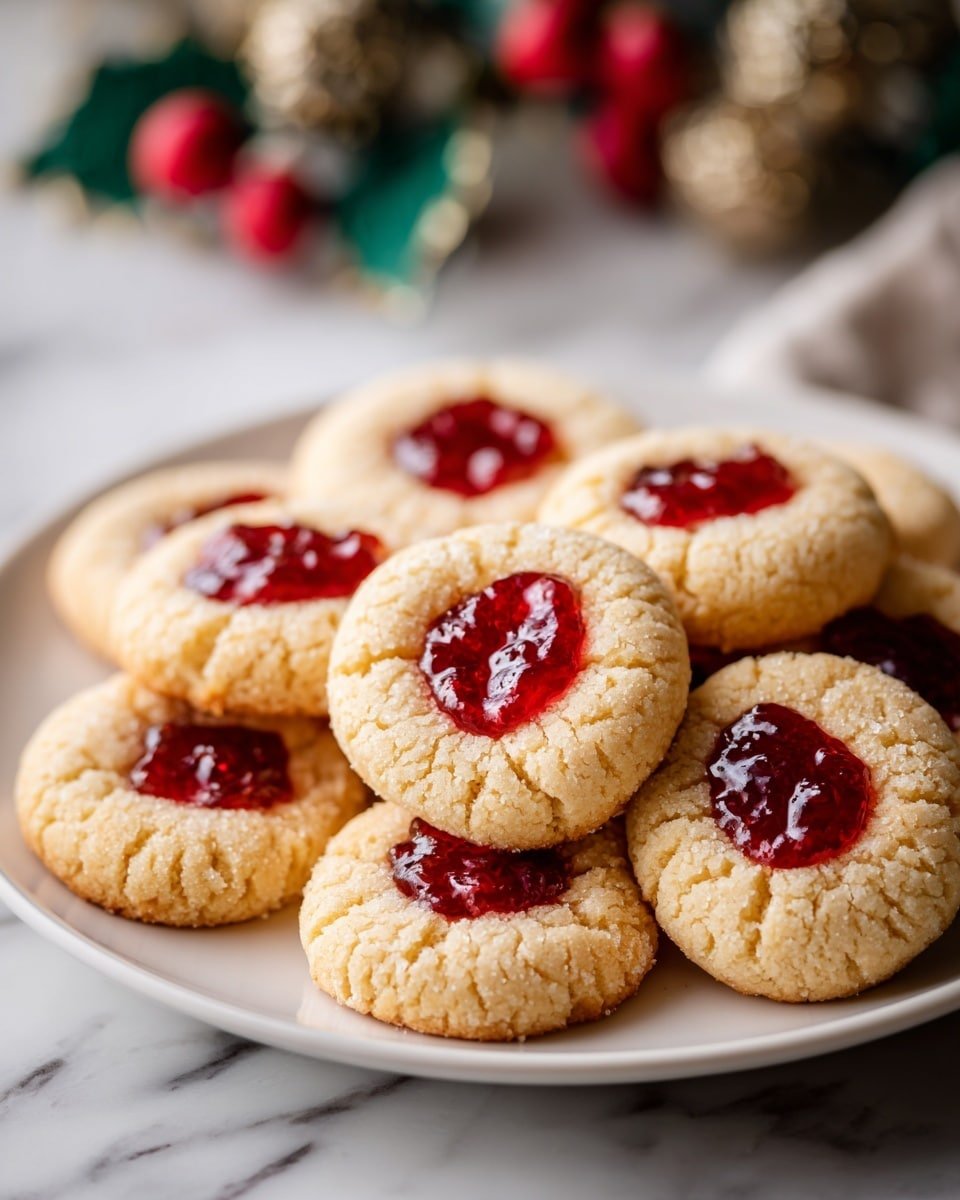
There’s something wonderfully nostalgic about a Raspberry Thumbprint Cookies Recipe — the tender, buttery dough hugging dollops of sweet, tangy raspberry jam right in the center. I love making these cookies when I want to bring a little sunshine and comfort to the table, whether it’s for afternoon tea, a festive gathering, or a quiet moment with a warm drink. You’ll notice how the golden edges and the shiny jam create a cozy, inviting treat that’s hard to resist.

Jump to:
- Meet the Magic Behind This Dish
- Why You’ll Love This
- The Essentials: Ingredients That Do the Work
- Step-by-Step: Bringing Raspberry Thumbprint Cookies Recipe to Life
- Pro Moves to Elevate It
- Switch It Up: Creative Variations
- Storage & Reheating Tips
- Serving Inspiration
- Frequently Asked Questions
- Notes & Handy Tools
- Full Recipe
Meet the Magic Behind This Dish
This Raspberry Thumbprint Cookies Recipe is inspired by classic flavors but stands out because of its wonderfully simple technique and clean, juicy burst of raspberry jam that perfectly complements the soft cookie base. What really makes it unique is that delicate balance between the creamy, buttery dough and the bright, fruity center. When you bite in, the aroma of vanilla mingles with the sweet, slightly tart jam, making each cookie one luscious little moment of joy.
Why You’ll Love This
This recipe is a little slice of cookie heaven that’s as approachable as it is delicious, making you feel like a confident baker in no time.
- Texture That Melts: The dough is soft and buttery, practically dissolving with every bite.
- Flavor Layers You’ll Crave: That tangy raspberry jam adds just the right pop of brightness against the richness.
- Quick to Master: Simple steps mean you’ll have fresh cookies on the table faster than you expect.
- Perfect Anytime Meal: Whether a snack, dessert, or gift, these cookies always hit the spot.
The Essentials: Ingredients That Do the Work
Choosing the best ingredients is your secret weapon here. Simple pantry staples come together, but each one plays a crucial role in the smoothness, flavor, and texture of your Raspberry Thumbprint Cookies Recipe. Trust me, taking a little time to pick quality butter and jam makes all the difference.
- Unsalted butter: Softened, not melted — this gives your cookies that creamy richness and helps control salt levels.
- Raspberry jam: Look for one with whole fruit bits or a good balance of tartness and sweetness to brighten the cookies.
Quick Note: Precise amounts and timing live in the recipe card at the end.
Step-by-Step: Bringing Raspberry Thumbprint Cookies Recipe to Life
Step 1 — Gather, Chop, and Prep
This is where your kitchen rhythm begins. Grab a mixing bowl, a hand or stand mixer, parchment-lined baking sheets, and measuring cups. Make sure your butter is softened to that perfect spreadable stage—too cold, and it won’t cream well; too warm, and the dough gets greasy. As you cream butter and sugar, watch for it to lighten to a pale, fluffy texture — this is your cue that you’re on the right track.
Step 2 — Heat, Stir, and Build Flavor
Next, beat in your egg yolk and vanilla — the aroma will start to feel cozy and inviting right away. When adding flour and salt, do it gradually so your dough stays tender not tough. Roll the dough into bite-sized balls, placing them spaced apart on your tray. Now comes the fun part: pressing a little well in the middle of each—thumb, spoon, or even a small tool—to cradle that beautiful raspberry jam. The sweet jam will glisten as it bakes and fill your kitchen with a warm fruity scent that’s just irresistible.
Step 3 — Finish and Taste-Test
As they bake to a delicate golden hue around the edges, keep an eye on their color and smell—the toasty notes mean they're almost ready. When you take them out, let the cookies cool on the sheet briefly; this helps the jam set perfectly without running. A little patience here rewards you with a cookie that melts in your mouth, with the jam’s brightness bursting through just as you hoped.
Pro Moves to Elevate It
I’ve learned a few tricks over the years that take this Raspberry Thumbprint Cookies Recipe from great to unforgettable. It’s all about gentle handling, perfect timing, and smart prep to make the best jammy cookies your kitchen’s ever known.
- Heat Wisdom: Bake at 350°F; too hot and the jam can bubble over, too low and the cookies won’t get those golden edges.
- Timing Trick: Don’t overbake—snag them as soon as the edges turn light golden for melt-in-your-mouth softness.
- Make-Ahead Strategy: You can chill dough balls overnight before baking for a sturdier cookie shape and more nuanced flavor.
- Common Slip-Up: Press too hard when making indentations, and the dough can crack or get too thin—just a gentle press does the trick.
Switch It Up: Creative Variations
Once you have the basics down, you can start experimenting with your Raspberry Thumbprint Cookies Recipe. Try swapping in different jams—blueberry, apricot, or even a luscious lemon curd for a twist. Adding a sprinkle of toasted coconut or chopped nuts on top before baking brings an amazing texture and a little extra flair to each bite.
When You’re Feeling Bold
If you want to elevate your cookies, mix a little lemon zest or almond extract into the dough for a fragrant lift. Or, fold in some finely chopped dark chocolate chips for a melty surprise. You could even swap half the butter for cream cheese to add a tangy richness that pairs beautifully with the raspberry jam, making your version uniquely yours.
Storage & Reheating Tips
These cookies keep well at room temperature in an airtight container for up to 5 days, but if you want them fresh beyond that, freezing dough balls before baking or fully baked cookies works wonderfully. To reheat, just pop them in a warm oven for a few minutes — you’ll get that freshly baked taste back with a soft, toasty finish. Avoid microwaving, as it can make the jam runny and the cookie chewy.
Serving Inspiration
The easiest way to enjoy your Raspberry Thumbprint Cookies Recipe is with a steaming cup of tea or coffee, letting the flavors mingle with the warmth. For a casual party, stack them on a pretty plate alongside a cheese board or fresh berries. If you’re going fancy, dust with a little powdered sugar or drizzle with melted white chocolate for a festive touch that guests will rave about.
Frequently Asked Questions
Fresh or frozen raspberries won’t hold as well in the cookie center without turning watery. Jam is best for that perfect glossy, thick texture in the thumbprint.
You can substitute vegan butter and use a flax egg instead of an egg yolk, but the texture might be slightly different. Using a vegan-friendly fruit spread helps keep the fruity center intact.
If the dough is too cold or dry, it cracks easily. Let it soften a bit at room temperature or add a touch more butter. Press gently when making the thumbprint to avoid breaking the dough.
Absolutely! Chilling the dough overnight firms it up and deepens flavors. Just remember to let it soften slightly before shaping and baking.
Notes & Handy Tools
I find using parchment-lined baking sheets not only keeps cleanup simple but also helps the cookies bake evenly without sticking. A small cookie scoop makes rolling consistent-sized dough balls effortless. And a silicone spatula is perfect for scraping every bit of that delicious dough from your bowl. These little tools make your Raspberry Thumbprint Cookies Recipe come together smoothly with less fuss.
PrintFull Recipe
Raspberry Thumbprint Cookies Recipe

Delight in these classic Raspberry Thumbprint Cookies featuring a buttery, tender cookie base filled with sweet and tangy raspberry jam. Perfectly baked until golden around the edges, these cookies are an irresistible treat for any occasion.
- Prep Time: 15 minutes
- Cook Time: 12 minutes
- Total Time: 27 minutes
- Yield: 24 cookies
- Category: Dessert
- Method: Baking
- Cuisine: American
Ingredients
Cookie Dough
- 1 cup unsalted butter, softened
- ½ cup granulated sugar
- 1 large egg yolk
- 1 teaspoon vanilla extract
- 2 cups all-purpose flour
- ¼ teaspoon salt
Filling
- ½ cup raspberry jam
Instructions
- Preheat Oven: Preheat your oven to 350°F (175°C) and line baking sheets with parchment paper to ensure easy removal of cookies and even baking.
- Cream Butter and Sugar: In a large bowl, cream together the softened unsalted butter and granulated sugar until the mixture becomes light and fluffy, which helps create a tender cookie texture.
- Add Egg Yolk and Vanilla: Beat the egg yolk and vanilla extract into the butter-sugar mixture until fully incorporated, adding richness and flavor.
- Combine Dry Ingredients: In a separate bowl, whisk together the all-purpose flour and salt to evenly distribute the salt throughout the flour.
- Mix Dough: Gradually add the dry ingredients to the butter mixture, stirring until a soft dough forms, being careful not to overmix to maintain tenderness.
- Shape Cookies: Roll the dough into small balls, place them spaced apart on the prepared baking sheets, then use your thumb or the back of a spoon to make an indentation in the center of each ball.
- Fill with Jam: Spoon a small amount of raspberry jam into each indentation, filling the center but not overflowing.
- Bake: Bake the cookies in the preheated oven for 12 minutes or until the edges turn lightly golden and the cookies are set.
- Cool: Let the cookies cool on the baking sheets for a few minutes before transferring them to wire racks to cool completely, allowing the jam to set properly.
Notes
- For best results, ensure butter is softened but not melted before creaming with sugar.
- You can substitute raspberry jam with other fruit preserves like strawberry or apricot for different flavors.
- To make the cookies gluten-free, use a gluten-free all-purpose flour blend instead of regular flour.
- If dough is too sticky to roll, chill it in the refrigerator for 30 minutes.
- Store cooled cookies in an airtight container at room temperature for up to one week.

Leave a Reply