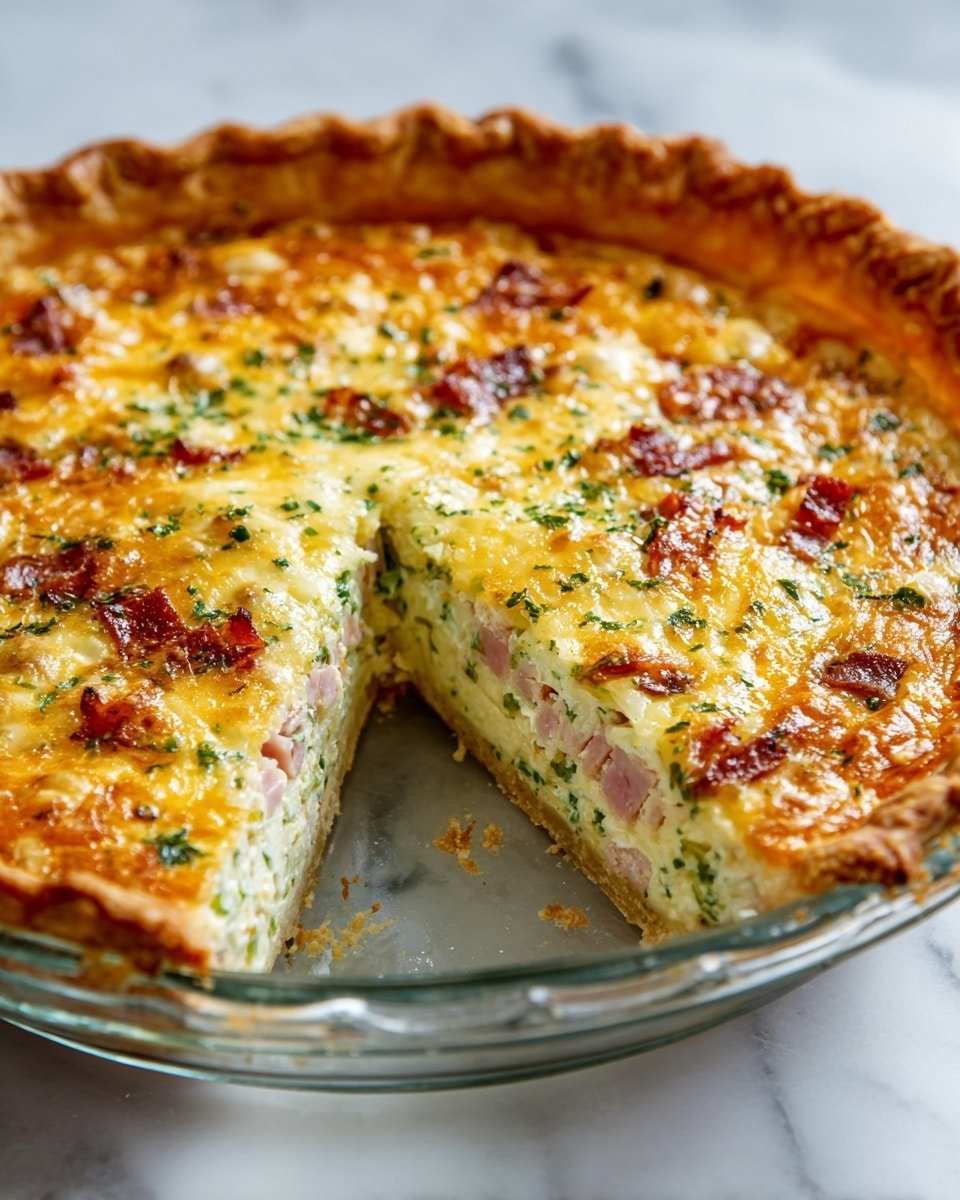
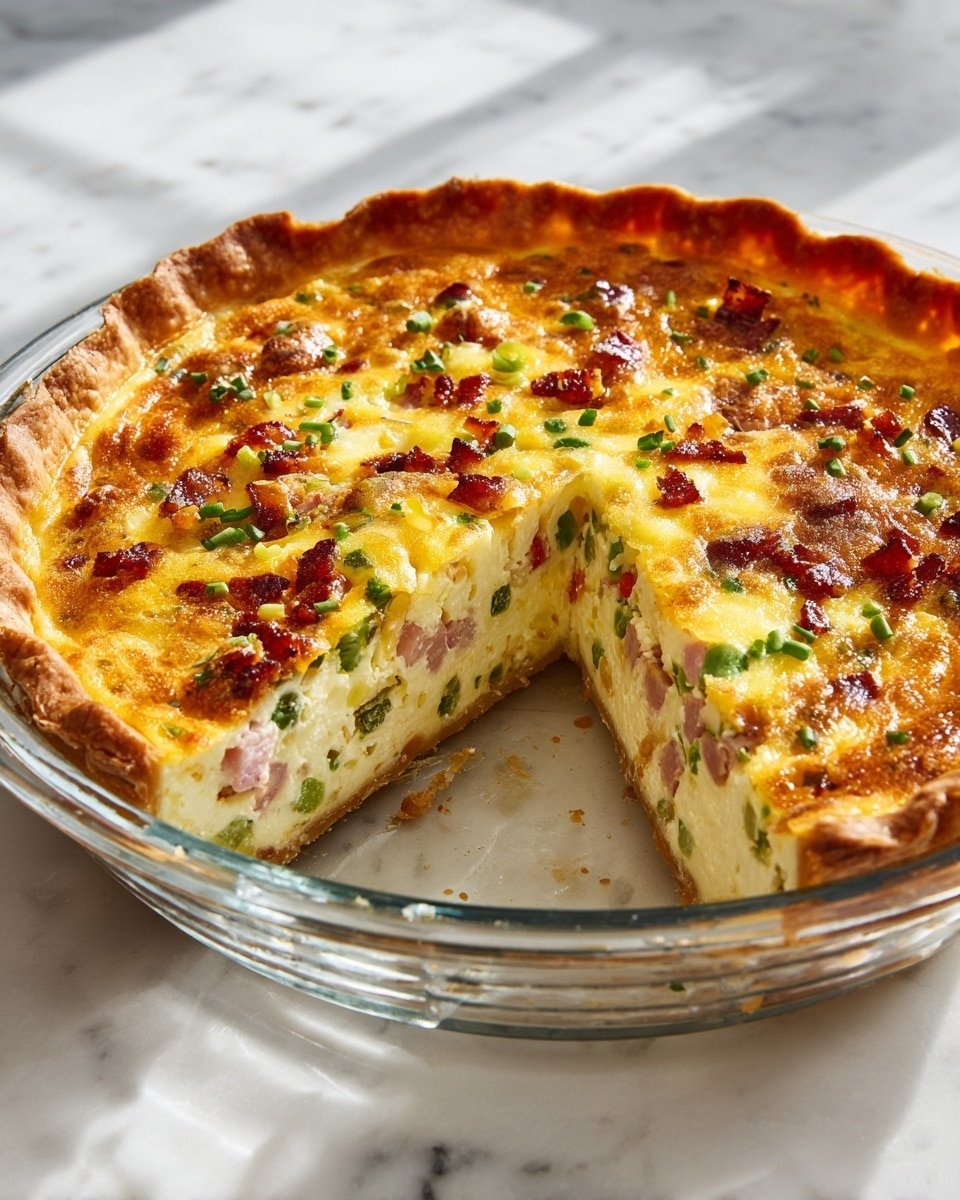
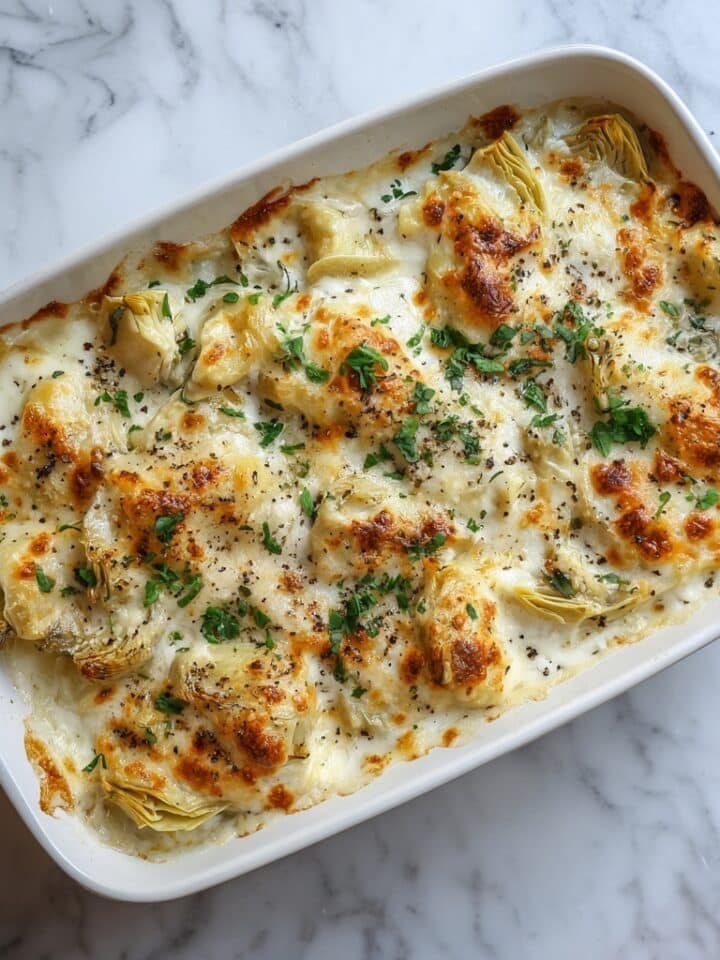
If you’re craving a breakfast that’s warm, comforting, and packed with flavor, this Breakfast Enchiladas Recipe will feel like a morning hug. Imagine biting into a toasty hash brown crust, filled with sharp cheddar, tender ham, and crispy bacon—each forkful bursting with creamy, cheesy goodness and just the right kick of roasted peppers. This dish is perfect for weekend brunches or when you want to impress your family with something cozy but totally doable.

Jump to:
- Meet the Magic Behind This Dish
- Why You’ll Love This
- The Essentials: Ingredients That Do the Work
- Step-by-Step: Bringing Breakfast Enchiladas Recipe to Life
- Pro Moves to Elevate It
- Switch It Up: Creative Variations
- Storage & Reheating Tips
- Serving Inspiration
- Frequently Asked Questions
- Notes & Handy Tools
- Full Recipe
Meet the Magic Behind This Dish
This Breakfast Enchiladas Recipe grew from my love of breakfast classics and a desire to switch things up with a crunchy twist. Unlike your usual soft tortillas, the hash brown crust adds a subtle golden crispiness that’s downright addictive. You’ll notice the moment it’s out of the oven, the aroma of melted sharp cheddar mingled with smoky bacon and sweet roasted red peppers fills the kitchen, making it impossible to wait for it to cool.
Why You’ll Love This
I love how this Breakfast Enchiladas Recipe combines textures and flavors effortlessly—it isn’t fussy, but feels special. You’ll appreciate how it holds together without sogginess and offers a lively balance of savory and creamy.
- Texture That Melts: The crispy hash brown crust melts into the rich egg and cheese filling for a perfect bite.
- Flavor Layers You’ll Crave: Roasted red peppers, sharp cheddar, and smoky ham make every mouthful exciting.
- Quick to Master: With simple steps and common ingredients, this recipe is approachable for any home cook.
- Perfect Anytime Meal: Whether breakfast, brunch, or a cozy dinner, it’s hearty and satisfying without feeling heavy.
The Essentials: Ingredients That Do the Work
Choosing quality ingredients makes all the difference in this Breakfast Enchiladas Recipe. Opt for freshly thawed hash browns and sharp cheddar that has a bit of bite to complement the savory meats. A pinch of Dijon mustard in the crust brings subtle tang, while fresh green onions add just the right pop of freshness.
- Frozen shredded hash browns: Thawed completely to press evenly and ensure a golden crust.
- Sharp cheddar cheese: Look for a flavorful one that melts smoothly but holds character.
- Dijon mustard: Adds a subtle depth to the crust—don’t skip it!
- Cooked bacon and diced ham: Use good quality pork for smokiness and texture contrast.
Quick Note: Precise amounts and timing live in the recipe card at the end. Following those will help you nail the perfect crust and filling every time.
Step-by-Step: Bringing Breakfast Enchiladas Recipe to Life
Step 1 — Gather, Chop, and Prep
Before turning on the oven, set out your pie pan and gather all ingredients. Make sure the hash browns are fully thawed and drained of excess moisture—that’s key for a crisp crust. Chop your green onions and dice the roasted red peppers so they’re ready to mix in. By the time you finish prepping, your kitchen should smell faintly buttery and inviting, getting you excited for what’s next.
Step 2 — Heat, Stir, and Build Flavor
Mix the hash browns with melted butter, Dijon mustard, and seasonings, then press firmly into your pie pan. As it bakes at a high temperature, watch for the edges turning golden and crisp. Meanwhile, whisk together eggs, cheese, green onions, peppers, ham, bacon, and half and half to create a creamy filling. Pour it gently into the baked crust once it’s ready, then lower the oven heat to let everything set beautifully with a puffy golden top.
Step 3 — Finish and Taste-Test
When the quiche feels springy to the touch in the center, it’s done baking. Let it rest for at least 15 minutes before slicing; this resting time lets the flavors settle and the structure firm up so you won’t have a messy slice. Take a moment to taste a bite—if it feels a bit mild, a dash of hot sauce brings a lovely warmth that awakens the creamy richness without overpowering it.
Pro Moves to Elevate It
I’ve found a few tricks that make this recipe shine even more. For starters, pressing the hash browns firmly gives you that sturdy, golden crust instead of a floppy base. Adding the Dijon mustard isn’t just for flavor—it helps bind those potatoes together. Also, timing when you add the filling can’t be rushed; letting the crust partially bake ensures it doesn’t turn soggy beneath the creamy custard. Lastly, don’t skip the resting period—it’s essential for clean slices.
- Heat Wisdom: Start the crust at 450°F to get that initial crispness before lowering the temp for the filling.
- Timing Trick: Let the crust bake fully before adding the egg mixture—patience pays off.
- Make-Ahead Strategy: This dish reheats beautifully; bake it a day ahead, chill, then warm gently for brunch guests.
- Common Slip-Up: Avoid soggy crust by draining excess water from hash browns really well before mixing.
Switch It Up: Creative Variations
Once you’ve made your first batch of this Breakfast Enchiladas Recipe, you might want to experiment with different fillings and flavor profiles. The great thing is this base welcomes creativity—think spinach and feta for a Mediterranean twist or swap ham for spicy chorizo for some extra heat and depth. Add fresh herbs like cilantro or parsley for brightness, or toss in diced jalapeños if you like that playful kick.
When You’re Feeling Bold
If you love turning up the volume, try layering in smoky chipotle peppers or replace cheddar with a blend of Monterey Jack and queso fresco for a creamier melt. You could even trade out the hash brown crust for corn tortillas brushed with oil and crisped for a lighter take on breakfast enchiladas inspired by Southwestern flavors. The sky’s the limit, and your kitchen is your playground.
Storage & Reheating Tips
This Breakfast Enchiladas Recipe keeps well in the fridge for up to 3 days, making it a great dish for busy mornings. To freeze, wrap slices tightly in plastic wrap and foil, and store for up to 2 months. Thaw overnight in the refrigerator, then reheat gently in a 325°F oven for about 15 minutes to warm through without drying out. Avoid microwaving directly, as that can lead to a less appealing texture in the crust.
Serving Inspiration
This dish is a star all on its own, but you can elevate your meal by pairing it with a crisp green salad tossed in a light vinaigrette or some fresh fruit on the side for a pop of sweetness. For casual weekend vibes, serve with your favorite hot sauce or salsa verde. If you want to fancy it up, a dollop of sour cream, a sprinkle of chopped chives, and a fresh lime wedge brightens every bite and invites conversation around the table.
Frequently Asked Questions
Yes! Just grate fresh potatoes and squeeze out as much moisture as possible to ensure a crispy crust. It’s a bit more effort, but totally delicious.
Absolutely! Omit the ham and bacon, and add sautéed mushrooms, spinach, or black beans for a flavorful plant-based version.
Make sure to thoroughly drain your thawed hash browns and bake the crust separately until golden before adding the filling—this step seals the crust and keeps it crispy.
Yes! Bake it a day in advance, then refrigerate. It reheats wonderfully in a moderate oven without losing texture or flavor.
Notes & Handy Tools
A sturdy 9-inch pie pan helps shape the hash brown crust perfectly. A whisk or fork to beat eggs smoothly will save you fuss. Use a sharp knife for those chopped veggies and don’t overlook a good-quality grater for the cheese. Baking spray is your friend here for easy release. Finally, a cooling rack gives the quiche a moment to rest and firm up—trust me, it’s worth it.
PrintFull Recipe
Breakfast Enchiladas Recipe

A savory and satisfying quiche featuring a golden hash brown crust filled with ham, sharp cheddar, and a medley of colorful vegetables, perfect for brunch or a comforting meal any time.
- Prep Time: 20 minutes
- Cook Time: 55 minutes
- Total Time: 1 hour 15 minutes
- Yield: 6 servings
- Category: Main Course
- Method: Baking
- Cuisine: American
Ingredients
Crust
- 16 oz frozen hash brown shredded potatoes, thawed
- 4 tablespoons butter, melted
- 1 tablespoon Dijon mustard
- ½ teaspoon garlic powder
- Pinch of salt and pepper
Filling
- 6 eggs, beaten
- 1 ½ cups sharp cheddar, shredded
- 4 green onions, chopped
- ¼ cup roasted red peppers
- ½ cup diced ham
- 3 slices bacon, cooked until crisp and crumbled
- ½ cup half and half
- Dash of hot sauce
- Chives for garnish
Instructions
- Preheat and prepare crust: Heat oven to 450°. Spray a pie pan with baking spray. In a bowl, combine thawed hash browns, melted butter, Dijon mustard, garlic powder, salt, and pepper. Press this mixture evenly into the bottom and up the sides of the pie pan to form the crust.
- Bake the crust: Place the pie pan in the oven and bake for 25 minutes until the crust is golden brown and crisp. Once done, reduce oven temperature to 350°.
- Prepare the filling: While the crust bakes, in a large bowl whisk together the beaten eggs, sharp cheddar cheese, chopped green onions, roasted red peppers, diced ham, crumbled bacon, half and half, and a dash of hot sauce until well combined.
- Assemble and bake quiche: Pour the egg mixture into the baked hash brown crust, spreading evenly. Bake at 350° for 30 minutes or until the center is puffed up and springs back lightly when pressed.
- Rest and serve: Let the quiche rest for at least 15 minutes before slicing to allow it to set. Garnish with freshly chopped chives and serve with extra hot sauce if desired. For make-ahead, reheat in a 325° oven for 15 minutes before serving.
Notes
- Make sure to thaw and drain hash browns well to avoid a soggy crust.
- Use sharp cheddar for a flavorful and tangy filling.
- Crisp bacon adds texture and smoky flavor—feel free to substitute with turkey bacon for a lighter option.
- Resting the quiche before slicing helps maintain its structure.
- Customize fillings with your favorite vegetables or meats.
- Reheat leftovers in the oven rather than microwave to keep crust crisp.


Leave a Reply